Planting Bulbs Outdoors
Click here to view our bulb planting chart.
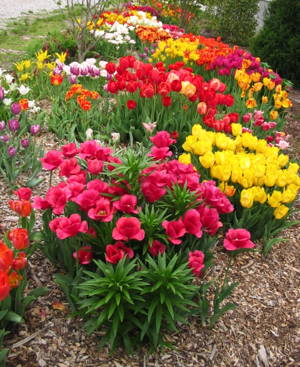 All the outdoor bulbs we offer are suitable for growing in Maine and the
rest of the Northeast. If you don’t know your hardiness zone, check
with your local cooperative extension or see the
USDA’s website detailed zone map. Also remember that you can use rock walls and heavy
mulch to shift conditions to your advantage.
All the outdoor bulbs we offer are suitable for growing in Maine and the
rest of the Northeast. If you don’t know your hardiness zone, check
with your local cooperative extension or see the
USDA’s website detailed zone map. Also remember that you can use rock walls and heavy
mulch to shift conditions to your advantage.
Note for Zones 8-11 only: Our bulbs are not prechilled. Almost all the bulbs we carry require a cold dormancy period in order to bloom. If you live in one of these warmer zones, you must refrigerate (38–45°) your bulbs for 2–3 months before planting during your coolest season. You can chill them in their packaging; keep them away from fruit and don’t let them freeze.
Planning and Planting
Bulbs are easy to work with, very rewarding and forgiving. They look best planted in groups or clumps, naturalized in the sod, under trees, or in beds, borders or rock garden. Good drainage is essential; bulbs will grow poorly or rot if too wet.
Bulbs can be planted successfully up until your ground freezes.
Prepare beds by mixing a bulb fertilizer, bonemeal and wood ashes, or other phosphorus and potassium sources into the soil below the level of the bulbs. We recommend our own Bulb Builder Mix. It’s approved for organic growers (unlike the widely available Holland Bulb Booster). Mix in compost to lighten heavy soils and increase nutrients. Peat is acidic—use with caution.
Plant bulbs pointed side up; generally the depth of the hole is three times the bulb’s height. See our bulb planting chart for suggested planting depth and spacing. Topdress the bed with compost.
Mulch your bulbs with 4–6" of leaves, bark, straw, etc. after the ground freezes. If you plant them against the house, it’s especially important to really heap on the mulch, as basement heat and reflected sunlight will likely remove the insulating snow cover, exposing them too early to alternating sunny days and freezing nights and damaging their growth tips.
Wherever they’re planted, bulbs need insulation. You need to mulch (or plant extra-deep) unless winter will provide a consistent heavy snow cover. A good mulch can also give protection up to half a hardiness zone, enabling you to experiment with bulbs not quite hardy in your zone.
Do not remove the mulch too early in the spring. By keeping the soil from thawing, mulch prevents heaving and false starts in early warm spells, and delays flowering slightly for a more uniform and longer-lasting display. Remove mulch as the growth tips begin to peek through, and dress the bed with compost or bulb fertilizer.
Pinch the blooms as they fade to discourage seed production and force the energy back into the bulb. This is especially important for tulips and hyacinths, which can otherwise lose their flowering vigor in 2–3 years.
Do not cut the foliage as long as it remains green; it produces the food for the bulb’s future blooms. Cut leaves only after they yellow. Sidedress with fertilizer or compost in late summer to mid-fall.
Troubleshooting
If squirrels, chipmunks or voles are a problem, try chicken wire or sharp gravel placed in the ground surrounding the bulbs. (Blood meal also repels many critters, but it also may repel people and attract dogs, skunks or raccoons.) Or plant Narcissus, Allium, Fritillaria or Spring Starflowers, which critters don’t generally bother.

To disrupt squirrels’ ability to “smell out” the bulbs in new plantings, we routinely dust those areas with black pepper and ground cloves right after planting in the fall and again in the spring when growth first emerges. The odor in the yard, reminiscent of chai, is a nice touch for us.
If after several years your bulbs produce leaves but not flowers, they may be suffering from overcrowding (dig in autumn, separate and replant), insufficient sun (move to new location), undernourishment (sidedress thoroughly) or marginal zone hardiness (give to a friend further south).